Add / Edit / Delete
Create new attributes, change existing values, or remove them individually or in bulk — with optional confirmation dialogs.
The add-in provides full CRUD control over attributes through the toolbar buttons in the Attribute Browser panel and also the context menu on rmt on each node.
Adding an attribute
Click the Add Attribute button in the toolbar to open the Add Attribute dialog.
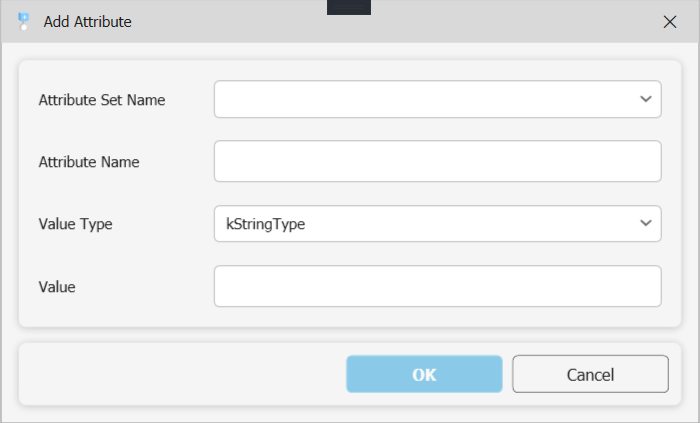
Fill in the following fields:
| Field | Description |
|---|---|
| Attribute Set Name | The name of the attribute set to add the attribute to. Type a name or pick one from your Attribute Library. Only chars are allowed. |
| Attribute Name | The key for the new attribute. Only chars are allowed. |
| Value Type | One of: String, Boolean, Double, Integer, Byte Array. |
| Value | The initial value for the attribute. |
Click OK to create the attribute. The tree refreshes immediately and keeps its expanded state.
Entering a Byte Array value
When Byte Array is selected as the value type, enter the value as a hex string. Each byte is two hex digits (0–9, A–F), and bytes can be separated by spaces, dashes, or colons — or written as a continuous string.
| Format | Example |
|---|---|
| Space-separated | FF 0A 1B |
| Dash-separated | FF-0A-1B |
| Colon-separated | FF:0A:1B |
| No separator | FF0A1B |
All four examples produce the same three-byte value. When you re-open an existing Byte Array attribute to edit it, the value is displayed in the space-separated form (e.g. FF 0A 1B).
Example — integrity checksum: A quality add-in writes a 4-byte CRC-32 of the part's key dimensions after sign-off: A3 F2 01 CC. A downstream export script re-computes the checksum and compares it to detect unauthorised geometry changes between approval and release.
Editing an attribute
Right-click an attribute node in the tree and select Edit. The same dialog opens pre-filled with the current values. Change the value and click OK to save.
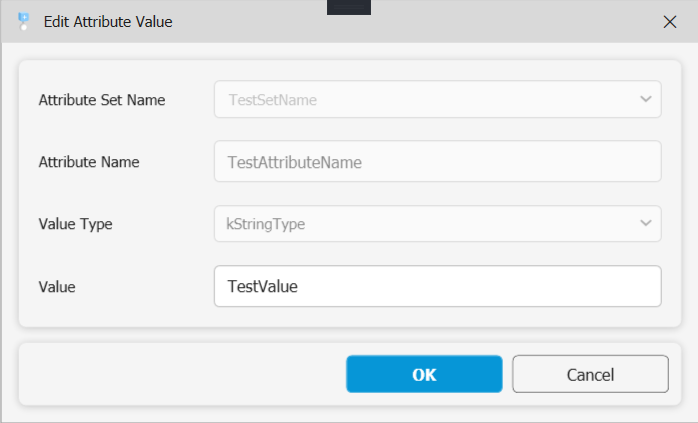
Only the value of an existing attribute can be changed. To rename an attribute, delete it and re-create it with the new name.
Deleting an attribute or attribute set
Right-click the node you want to remove and select Delete.
- Deleting an attribute removes that single key/value pair.
- Deleting an attribute set removes the entire set and all attributes within it.
Optional confirmation dialogs can be configured in Settings to prevent accidental deletions.
Deleting via the toolbar
The toolbar provides two dedicated delete buttons:
| Button | Icon | Action |
|---|---|---|
| Delete Selected | Trash | Removes all attributes from the objects currently selected in the Inventor viewport |
| Delete All | Trash + ✕ | Removes every attribute from the entire active document |
Both actions support optional confirmation dialogs, configurable in Settings.
Autodesk-created attribute sets (such as those used by iLogic) are excluded from bulk deletes by default. Enable Delete Autodesk Default Attribute Sets in Settings only if you intentionally want to remove iLogic data. This will damage some functionality. Also there are other properties and not all of them might be in the exclusion list!